The Touring Commuter
2024-04-16 — 2025-08-11This is a quick summary of how I turned my commuter bike into a touring/bikepacking bike.
All this stuff is entirely subjective and personal, this is just documenting what I did and not what might or might not work for you.
Giant Cross City 1
The bike is a Giant Cross City 1 Disc 2018 size Large.
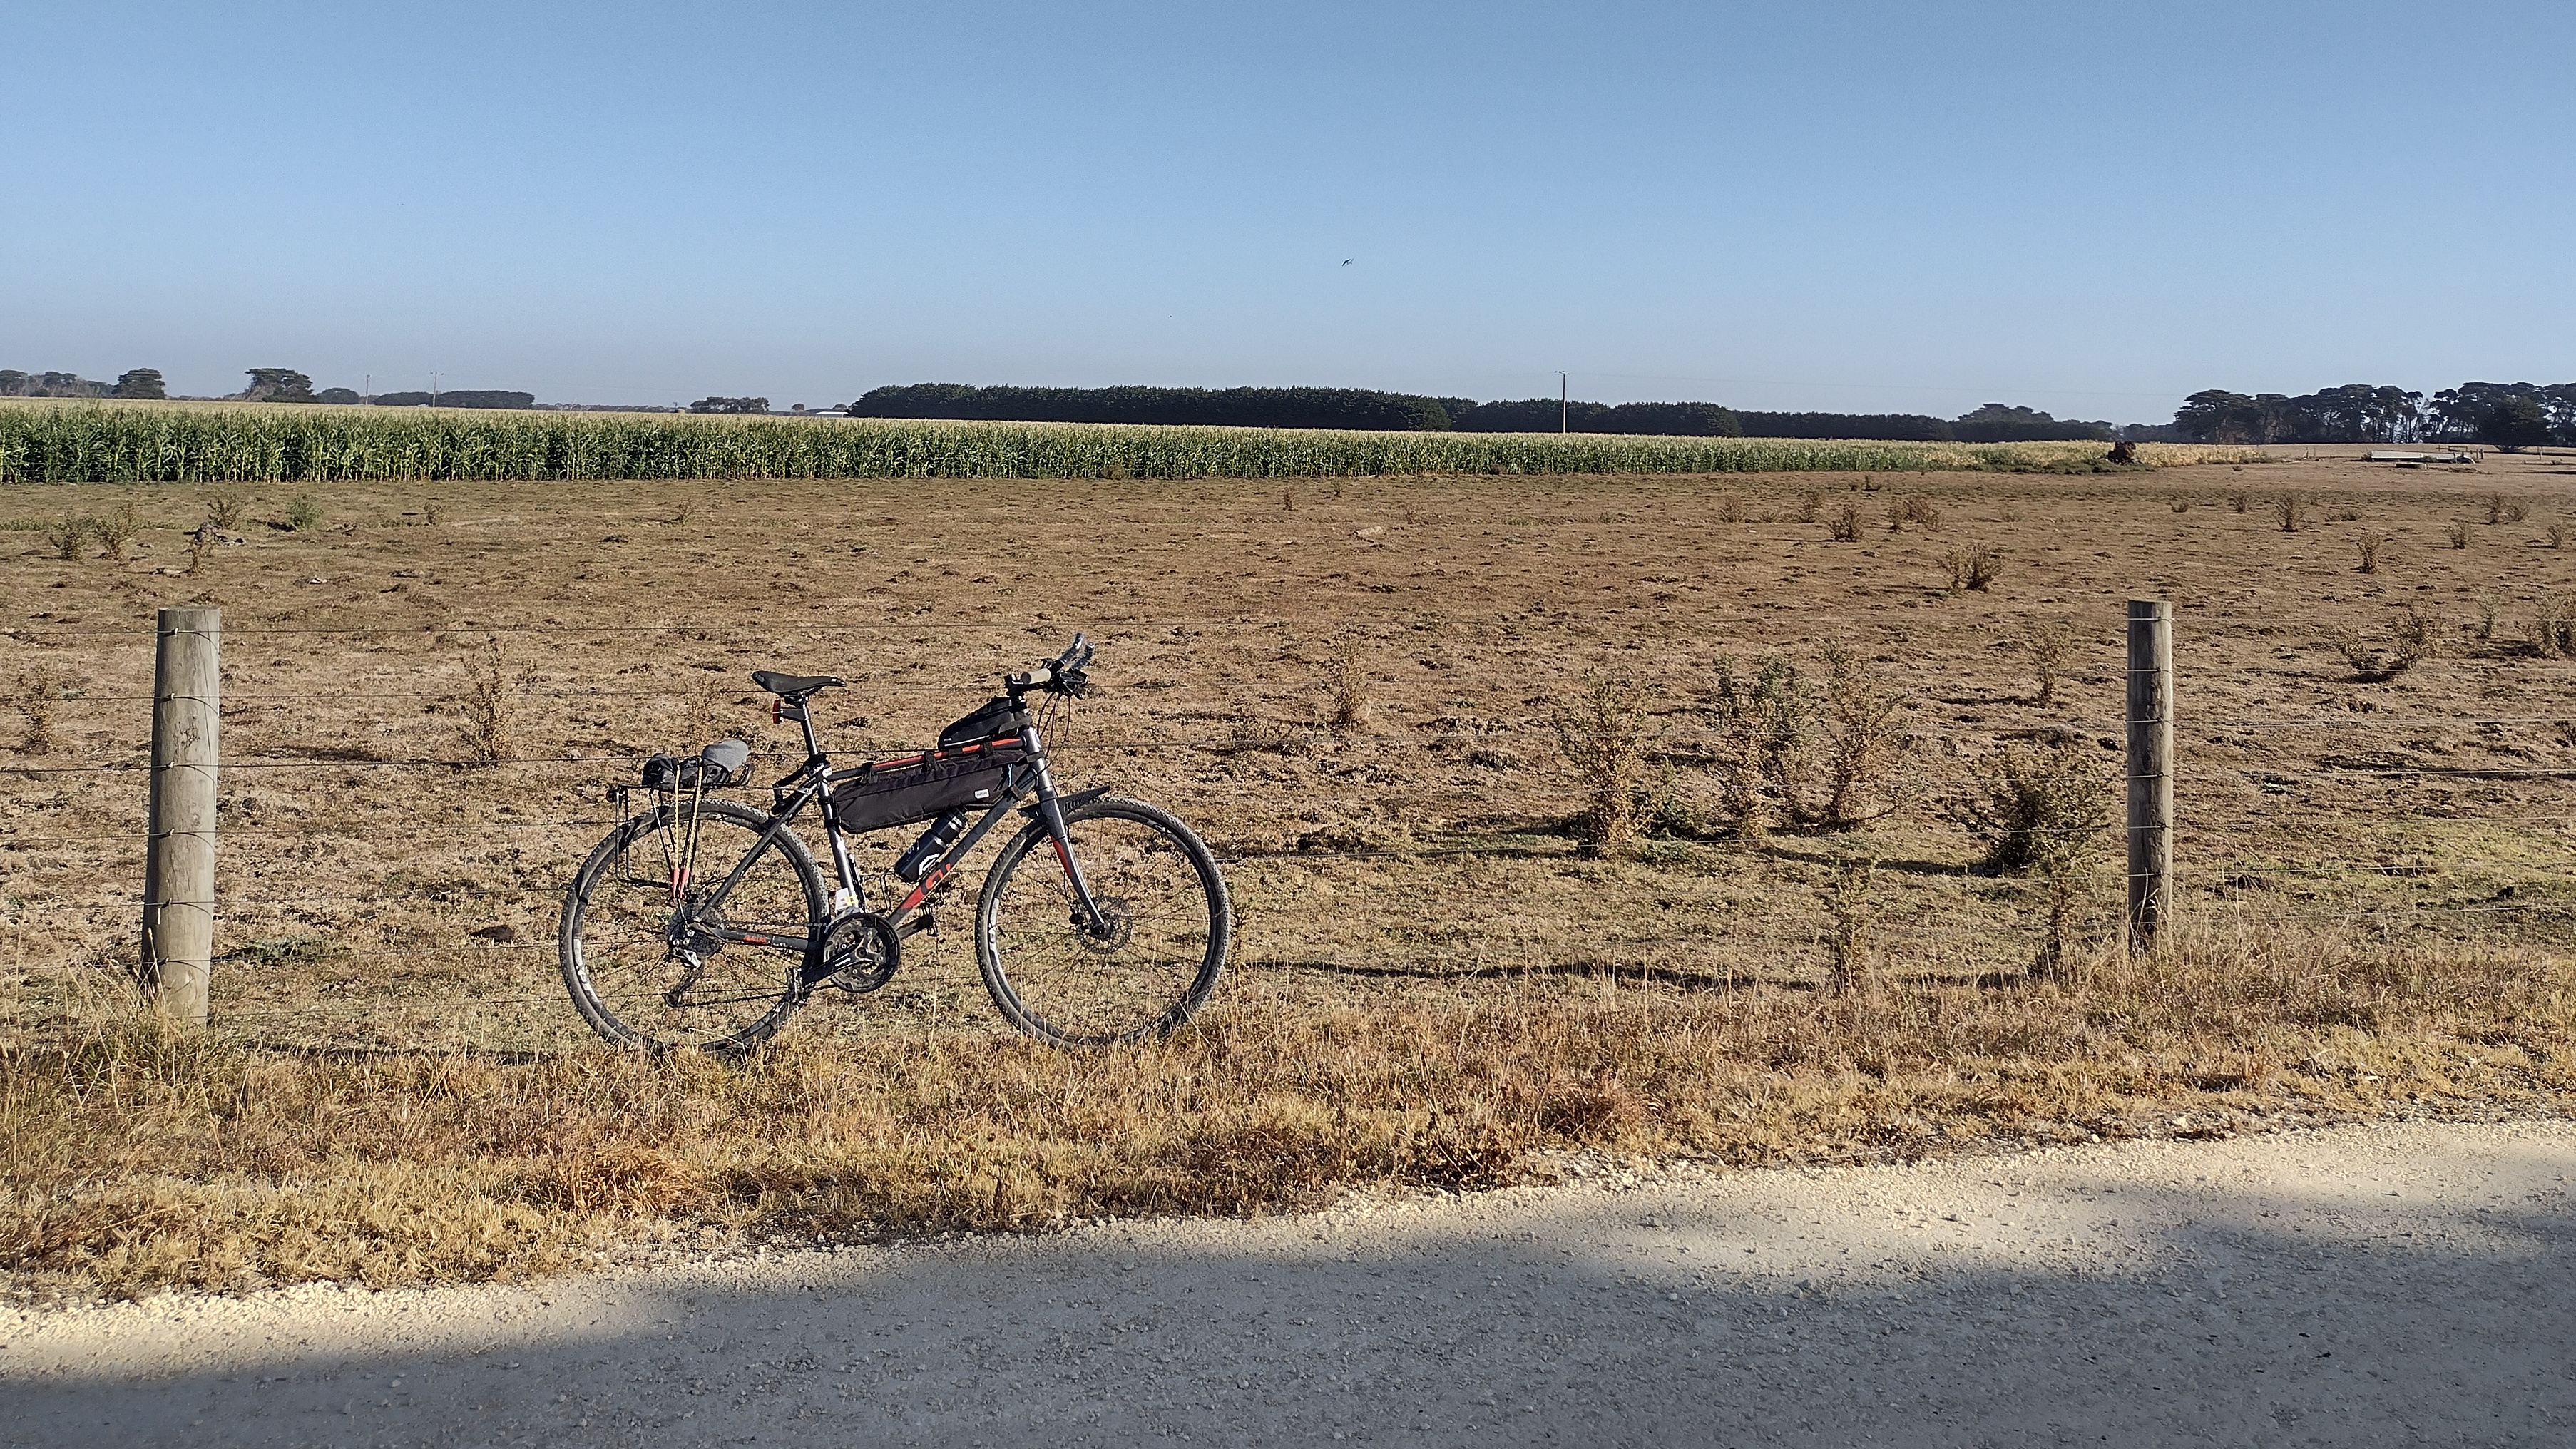 The bike, on the Port Fairy Rail Trail
I test rode a few things but I really liked this one: it’s not a huge bike and the standover height is quite low, but it has an alloy frame, good brakes, carbon forks and a wide range of gears.
I bought it as a commuter and it did a couple of years of that, very slowly getting upgraded as the opportunity arose …
Cross City 1 Derailleur Hanger
There’s some chance you’ve stumbled upon this page while trying to find out what derailleur hanger you need for this bike. Why are bicycle manufacturers like this?
The Cross City isn’t listed in the GiantBikeSpares Hanger Finder but it uses a R01630 hanger. I think the “Cross City” is just a local name for the Escape, maybe?
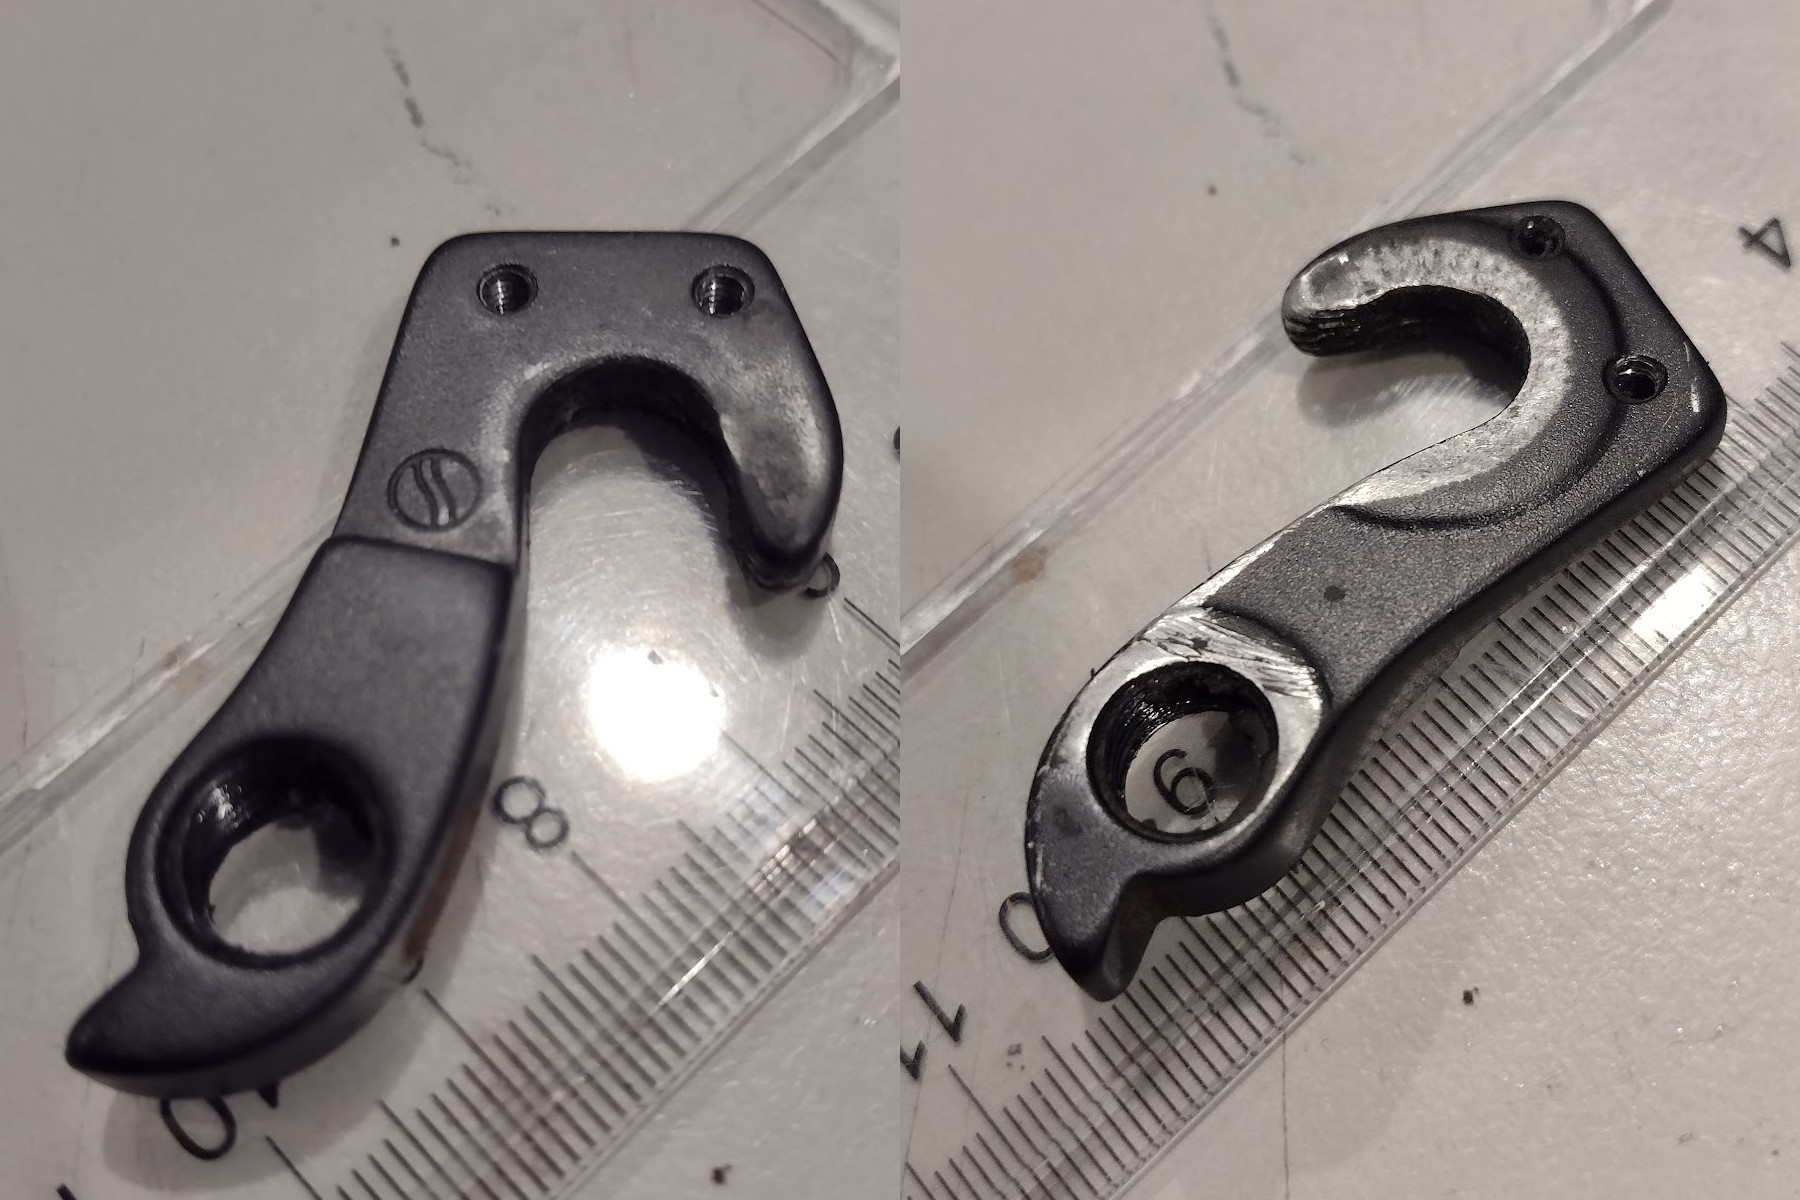
I took the old hanger down to Giant Knox City and bought a new R01630 hanger from them as a spare, it is definitely the correct one! So that settles that. The difference is, it does not have a ridge which fits inside the dropout.
UPDATE: The hanger is held in place with two screws, these are countersunk M3 x 8mm total length. The stock ones have a 2.5mm allen key head, but it’s almost impossible to find these anywhere. 2mm hex, T10 and PH1 are available though.
Tyres
The bike came with 32mm road tyres which were okay but I found them sluggish at low pressures and squirrelly at high pressures and never found a sweet spot between the two. I replaced them with a set of 40mm Schwalbe Marathon Mondials (I’d checked the maximum tyre clearance before I bought it) which I liked a lot better. I’ve also run it with regular Marathons, or with a Marathon on the front and a Marathon Mondial on the back, which worked nicely.
(don’t feel bad for the old tyres, they went onto the pub bike)
It’s been rather wet around here lately so I’m currently running 40mm gravel tyres which aren’t quite as hard wearing or easy rolling as the Marathons but a lot more effective when the trails are muddy. So far I’ve tried Maxxis Ramblers and WTB Vulpines, pretty happy with both although the Vulpines were a real battle to get mounted.
UPDATE: not because they were tight, they were very floppy and kept trying to fold themselves back up into the shape they were when shipped. I changed them out for summer and putting them back on this winter wasn’t a problem at all, they’d come to terms with their new shape by then!
I tend to run the rear tyre pretty much at it’s pressure limit and the front tyre a little softer, which given the weight distribution of bike & rider should help a bit.
Up Front
Handlebars
Originally it would have had a 105mm stem length but the dealer changed it over for a 120mm +6⁰ to add a little room.
The bars were fairly long (maybe 720mm?) and I found my hands always moved in a little on the grips so I hacksawed a bit off each bar end to make the whole thing narrower, and liked it like that. I think I cut it down to about 660mm.
(Cutting down bars is pretty easy to do. If you don’t have a pipe cutter, you can just wrap masking tape around the bar and use that as a guide line for a hacksaw with a fine tooth blade.)
Later I replaced the bars with SQlab 310 Sport 2.0 bars which have a little more backsweep (16⁰) and a little downsweep (10⁰) and no rise at all. They’re about 680mm wide. I might get around to trimming them back to 660mm or so. I don’t really understand super wide bars, unless you’re doing downhill or something, they just turn you into a windsock and catch more trees.
The other option I was considering was Ritchey Kyote which have more backsweep at 27.5⁰ … but at 800mm I’d have to cut a lot off the ends …
I found with the swept bars the “ergonomic” grips which came with the bike no longer really sat well in my hands so I’ve put on PNW Loam XL grips which are just amazing. These are a couple of mm larger diameter than the standard ones and that makes a big difference to hand comfort for me.
Stem Setup
To compensate for the lack of rise in the bars, and my aging back, that 120mm stem is now flipped to -6⁰ on top of 90mm of stem riser. Putting a negative stem on top of a riser might seem a bit perverse but combined with the head tube angle, having the stem angle negative makes the stem pretty much horizontal and that moves the bars a little further forward as well. There’s a few mm left in the stack if I want to go slightly higher or lower.
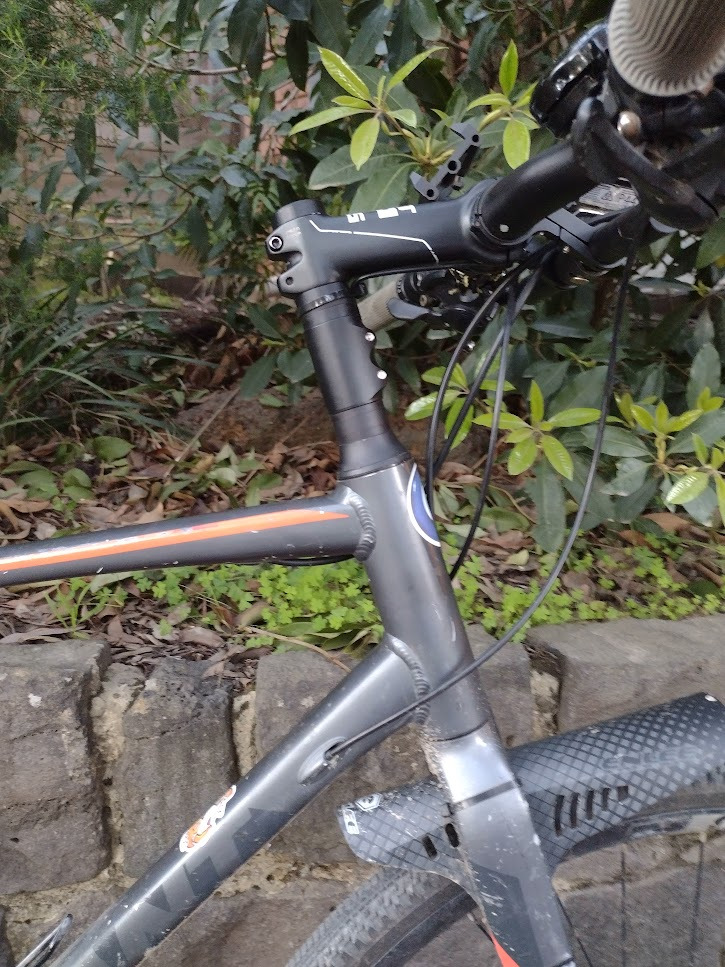 does my steerer look big in this?
It’d probably look ridiculous if it wasn’t for the top tube bag which sits just behind the steerer. That holds my headlight battery, some tools and generally wallet & keys & such when riding. It’s far forward enough that I can still stand over the frame behind it.
 extended steerer with top tube bag in place
Possibly all this indicates that I should have bought the size XL frame, but from memory the standover height seemed a bit too high, and that’s pretty important for comfort too.
Inner Bar Ends
I also have a couple of inner bar ends which are just cheap 150mm “classic bar ends” from BBB, with a pair of very cheap flexi rubber grips forced over them (try some compressed air down the hole in the end) They’re not perfect but they’re enough to let me swap my hand positions around when they’re getting tired, or pull myself forward for a long slow climb.
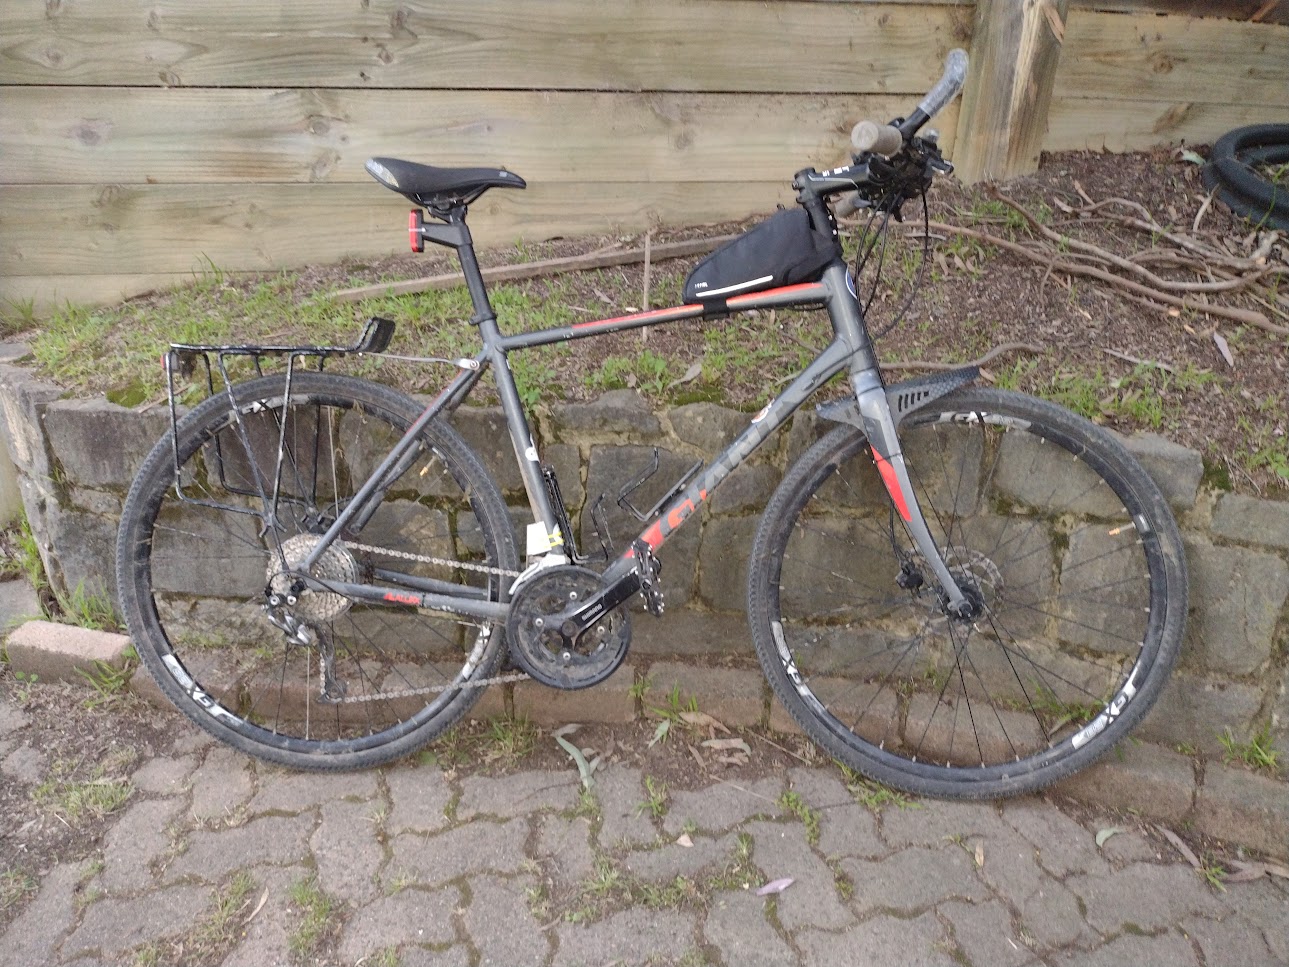
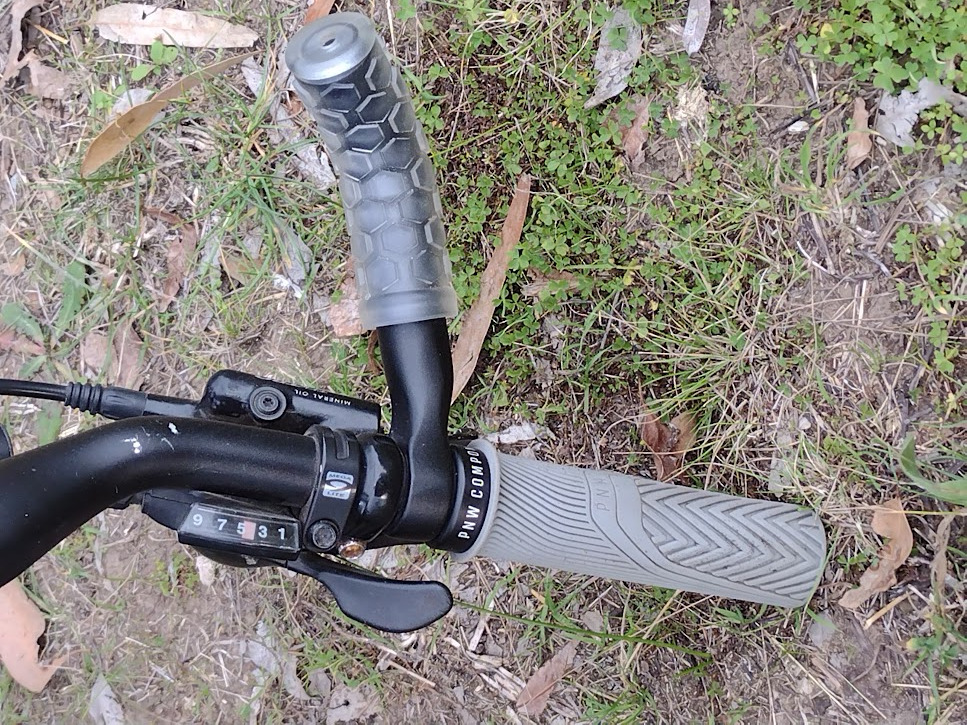 Handlebar setup
While that takes my hands away from the brakes it’s actually pretty easy to slide my hands down and brake with my outer fingers. Since the bars got a bit narrower as well there’s no problem with the cables reaching.
Granny Gears
One of the things I really liked about this bike was that it came with a broad range of gears: a triple 26/36/48 crankset and a 9 speed 11-34 cassette.
I know triples are uncool these days, and everyone loves 1x drivetrains because having two separate gear shifts is rocket surgery and beyond young people or whatever. Hey, I can be a hipster too: I retrofitted my daughter’s bike with a single narrow/wide front sprocket and a 9 speed friction shifter for the back. Gnarly. But I still like 3x for the wider range.
The stock lowest gear, 26:34, is quite low indeed at 21 gear inches, but I ended up using it quite a bit, for example on gravel roads where it’s quite nice to be able to spin up hills even if you’re going slow.
The rear derailleur is able to handle up to a 36T cassette. To that end, when the 11-34T cassette was getting worn out I replaced it with a 11-36T making that lowest gear about 6% lower.
Then, when the inner crankset gears were starting to look a bit shonky I replaced the smallest one with a 24 tooth, making those gears about 7% lower.
So now I have a 655% gear range and a ridiculously low 24:36 (18 gear inches) granny gear. I don’t need very often but I reckon I use it more than the 48:11 (119 gear inches) highest gear. The chain is a bit short if you try to shift into the largest gear on both the back and the front but there’s no reason to want to do that so I don’t.
As for 1x drivetrains: call me back when they release a 10-66 tooth 12 speed cassette :-)
The smallest chainring is an alloy Truvative 24T (hey it was in stock), the middle a Deore FC-M590 36T and the biggest one is the stock Acera 48T but they all seem to get along.
Oh, and as they’ve worn out I’ve changed the bottom bracket and chain and pulleys over for Deore ones which are a very slight upgrade for only a couple of bucks extra.
Axles & Skewers
The only thing which has really gone wrong on this bike has been the quick-release skewers, each of which let me down at one point or another.
Yes, the QR skewers make it quicker to change tyres but on this bike I’ve had more QR failures than punctures!.
I’d tried replacing the rear axle with an Ebay solid axle (3/8” x 26tpi). This worked fine, the dimensions are close enough that everything fits, so it’s worth bearing in mind if you’re stuck with dead bearings in a one-horse town.
But it proved slightly annoying because the solid axle didn’t fit with a lot of cassette lock ring tools which use the skewer hole for alignment, and also I had to keep a 15mm spanner in the toolkit to undo the axle nuts.
I’ve ended up replacing the skewers with allen key skewers since I always carry allen keys anyway. It’s really just a very long bolt and a fancy nut and washer but it looks okay and it’s easy to tighten enough to keep the axle in place and as a bonus the wheels are slightly less convenient to steal.
You can also get 5-sided ones which would be slightly more secure but then you’d need to carry an extra tool.
Wheel Bearings
I recently rebuilt the wheel bearings and the bike feels so much better for it. Useful information:
| Rear | Front | |
| Axle Length | 145 | 108 |
| Axle Thread | M10 | M9 |
| Cone Dia | 17 | 15 |
| Cone Flats* | 15, 16 | 13, 14 |
| Cone Depth** | 14 | 12.5 |
| Cone Locknuts | 17 | 17 |
| Ball Size | 1/4” | 3/16” |
| Ball Count | 9 ea | 10 ea |
* there’s two sets of flats on each, the bigger flats are so narrow as to be almost unusable though so you really want a 13/15 combo cone spanner for this.
** as measured, I think the “official” sizes might be 13.8 and 12.8 as per wheels mfg
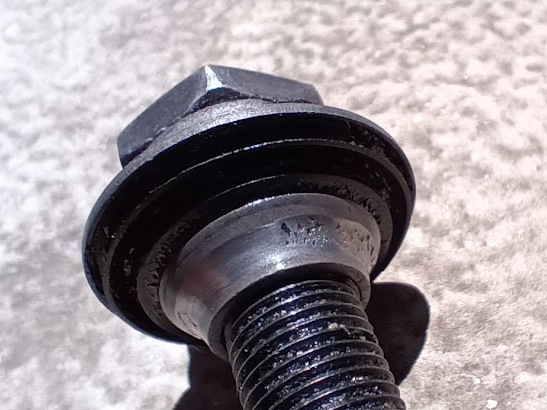 Replace your cones BEFORE they look like this!
Freehub
I’ve just replaced the freehub too.
The Giant dealer supplied a 152B-FH2040-801 "FH204 FREEHUB BODY (WATERPROOF) FOR GRB52/GRB1035/GRB1032/GDC1022"
and this needs an 11mm hex key to remove.
Thankfully, the one I bought comes with an 8mm -> 11mm adaptor in the bag.
I should have done this at the same time as I did the bearings, but at least now it’s done!
Pedals
The stock plastic pedals got dangerously slippery real quick. But I’m just too much of a klutz for cleats / clipless pedals, and also I find it useful to have hiking shoes on for inevitable hike-a-biking sections.
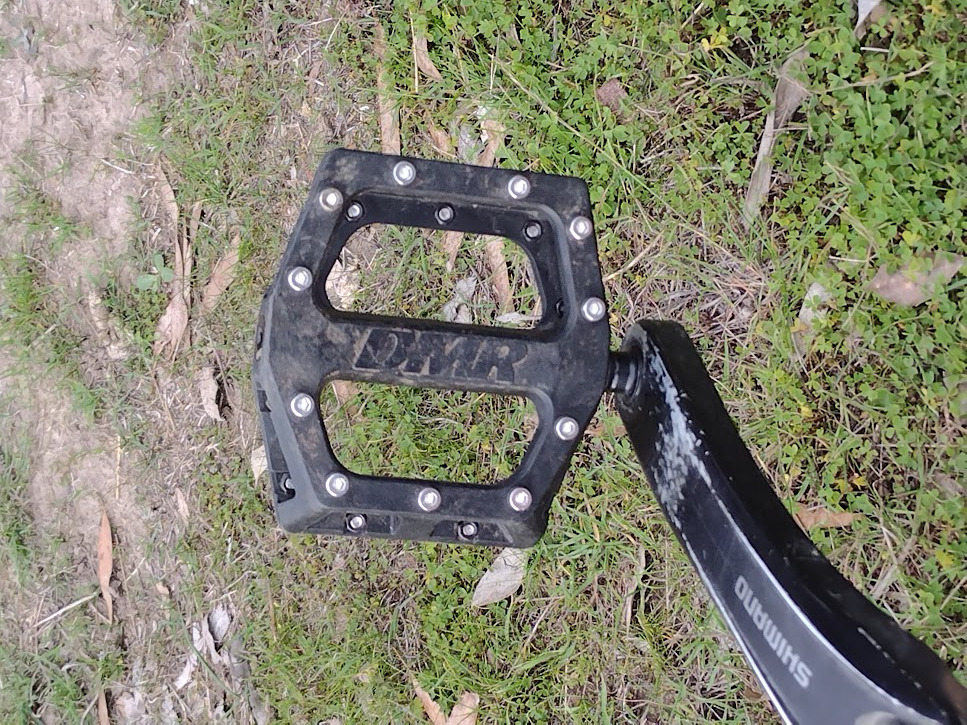 Pedals with replacement studs
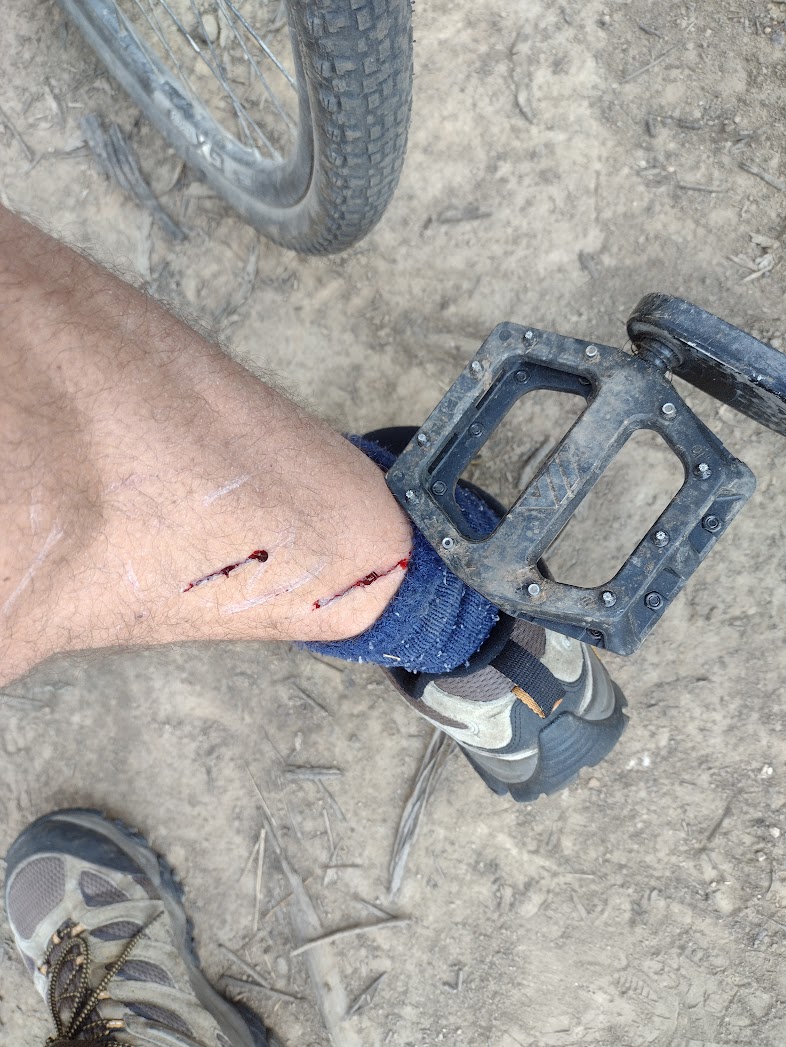
I’ve replaced them with some DMR V11 flat pedals (hey, they were on special). The bearings are much better than the previous Giant flat pedals but unfortunately they come with very pointy little studs which were quite painful if you contact them.
So I’ve replaced the studs with 44 stainless socket head screws (M4 x 0.7 x 6mm) They are still very grippy with the tread on my usual hiking shoes but much less aggressive to my calves. These cost $20 for 100 from a local bolt supply place. The heads fill up with mud but that’s a small price to pay.
Saddle
All of the above stuff is subjective and personal, but there is nothing more subjective and personal than saddles. There’s a million articles out there about chamois and sit bones and I’m not going to write another one but I’ll just say that adjusting a bad saddle correctly won’t turn it into a good saddle but not adjusting a good saddle correctly will still leave you hobbling.
I found the Selle Italia S5 to be a good fit for me personally and if you’re getting any kind of numbness in your nether regions on long rides I’d really recommend trying out the split-style saddles. Because it’s a curved saddle you’ve got to mess around a bit with the angle adjustment rather than line it up horizontally like you could with a flatter saddle.
Summary
I’ve put a lot of miles on this bike, and intend to put on plenty more. By now I’ve probably spent more on accessories and replacement parts than on the original bike, but what I’ve ended up with is a bike which runs very well.
The point is: despite all the different brand names and spec levels, you can run a total dog’s breakfast of bits and pieces and it’ll mostly work just fine.
Which is pretty wonderful, when you think about it.
Coming soon: luggage!
UPDATE 2025-08-11
It’s nice to see Path Less Pedaled also considering wider gear ranges as a priority …
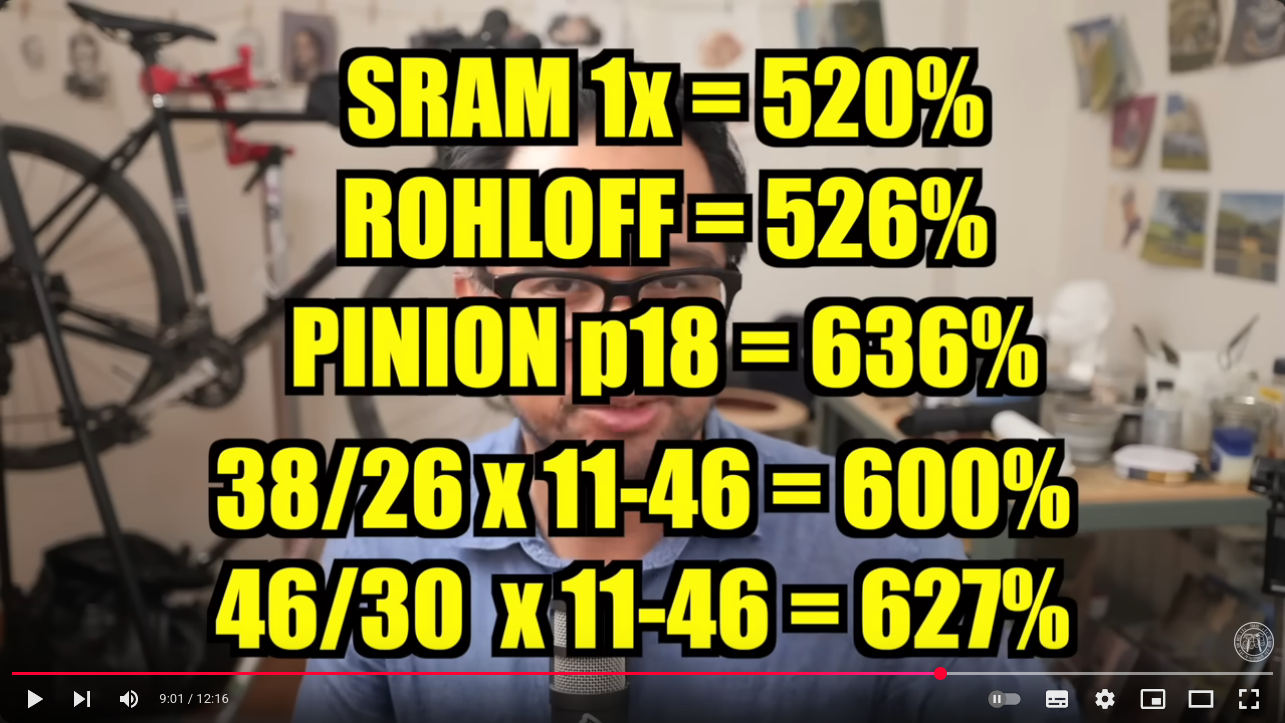 Path Less Pedaled compares gear ranges