Using the Waveshare IMX577 Camera from Python
2026-09-21In this article I mentioned I was upgrading to a better camera, well, the better camera is here …
Waveshare IMX577 Camera
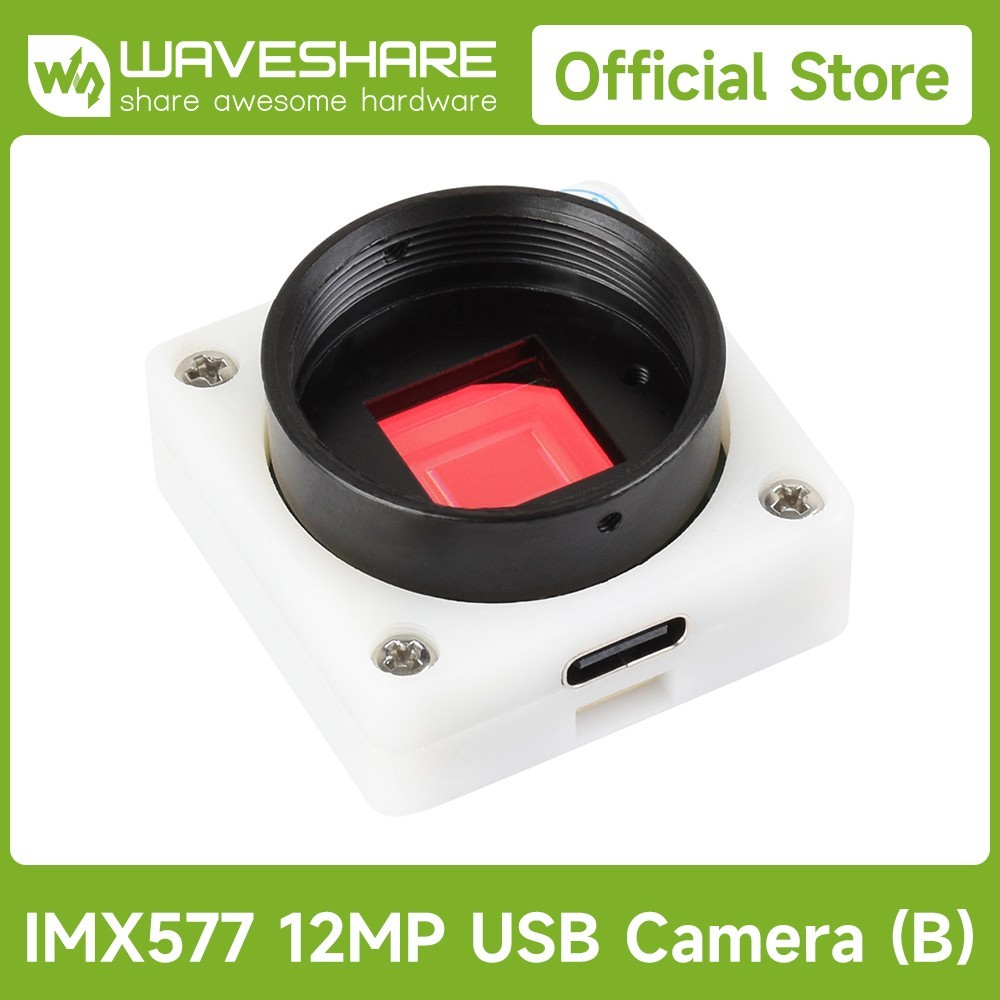 IMX577 based USB camera from Waveshare
It’s a Waveshare IMX577 Camera which connects a Sony IMX577 sensor and a USB2 interface.
The USB2 interface is not without its limitations: somehow the sensor’s native 4056 × 3040 gets trimmed down to 3840 × 3024 and the frame rate is a bit limited by the USB interface, but it does save messing around with CSI-2.
It also has a CS mount which suits various C and CS mount lenses and adaptors.
The sensor size is called ‘1/2.3”’1 which is 7.857mm on the diagonal. Sensor pixels are 1.55μm on a side, so you can work out with the crop the image area is actually 5.952mm x 4.687mm with diagonal 7.576mm2.
Interfacing from Python
There’s two major ways to use the camera from Python, and each has its benefits and limitations.
linuxpy.video.device
The linuxpy package is a
“Human friendly interface to linux subsystems using python”3.
It includes a linuxpy.video.device.VideoCapture interface which
supports python asyncio.
pip install linuxpy
Device
from linuxpy.video.device import Device
device = Device('/dev/video0')
We can also iterate over all the video devices in the system using
iter_video_capture_devices, and once we’ve opened the device
we can use device.info to hopefully find the one we’re looking for:
from linuxpy.video.device import iter_video_capture_devices

for device in iter_video_capture_devices():
    device.open()
    print(f"{device.filename} {device.info.card}")
    for frame_size in device.info.frame_sizes():
        print(f"{frame_size.pixel_format.human_str()} @ {frame_size.info.width} x {frame_size.info.height}")
    device.close()
don’t forget to call device.open() …
VideoCapture
from linuxpy.video.device import VideoCapture

capture = VideoCapture(device)
capture.set_format(1024, 768, "MJPG")
with capture as frames:
    async for frame in frames:
        read_io = BytesIO(frame.data)
        image = Image.open(read_io, formats=['JPEG'])
OpenCV2
An alternative to linuxpy is to use OpenCV which
should give us cross-platform compatibility, not that I’ve tried it.
There’s a CPU-only version of opencv for Python but depending on what you’re doing you might want to use a OS package instead which might use the GPU as well. Let’s go with the plain old CPU version for now:
pip install opencv-python cv2_enumerate_cameras
import cv2
from cv2_enumerate_cameras import enumerate_cameras

for camera_info in enumerate_cameras(cv2.CAP_ANY):
    print(camera_info)
    cap = cv2.VideoCapture(camera_info.index, camera_info.backend)
OpenCV exposes the “four character code” (Four CC) values for video formats, so you need to put up with these:
import cv2

fourcc = "MJPG"
cap = cv2.VideoCapture("/dev/video2")
cap.set(cv2.CAP_PROP_FOURCC, cv2.VideoWriter.fourcc(*"MJPG"))
don’t miss the asterisk there … the fourcc method expects four
single character parameters!
OpenCV also always decodes the frames to a pixel array. This means that if you’re capturing JPEG from the camera, it will always get decoded and need to the reencoded before saving it or sending it somewhere, by doing something like:
okay, cv2_image = cap.read()
image = Image.fromarray(cv2_image)
image.save('capture.jpg', "JPEG", quality=90)
Asynchronous Fetching
There isn’t an asyncio-compatible way to fetch frames,
but it’s not so hard to run opencv in a separate thread,
save the frame and trigger an asyncio event whenever a new
frame is available, using something like
call_soon_threadsafe to let any task waiting on the
new image retrieve it straight away.
Resolutions vs. Frame Rate
The camera can output various resolutions, for some reason in MJPG mode they all seem to come out at around 20-30 FPS, which is different from the reported FPS.
The actual FPS seems to depend on all sorts of things possibly including illumination and focus, but once the camera starts capturing it is stable. There’s a lot I don’t understand about this yet.
The actual IMX 577 sensor is capable of a lot more, so this has to be down to the processor in the camera and/or the USB connection to the PC.
I’d also tried capturing in YUYV mode and in some resolutions got as good or higher frame rates than in JPEG for small resolutions. YUYV would be nice as there is less of an issue with artifacts than JPEG, but but I found some problems with image corruption / truncation in both linuxpy and opencv so I’ve shelved that for now and will come back to it.
It’s also not clear to me why the sensor runs at weird framerates instead of locking itself to 20 or 30 or whatever. I might have to buy one of those CSI cameras after all!
Pan, Tilt, Zoom
Both linuxpy and opencv2 expose interfaces which allow the camera to only capture part of the sensor data. It won’t zoom past 1 image pixel per sensor pixel and it won’t pan or tilt past the edge of the sensor, so to use this, you first have to set up capture for a resolution smaller than the maximum, and then you can zoom in, and then you can pan/tilt the zoomed window around within the image.
I’m not too fussed about panning at the moment since the camera is already attached to a mechanism to move it around. But zoom is easy enough to implement and makes it convenient to retrieve smaller images without losing resolution.
Zoom in LinuxPy
Zoom seems to be a value from 0 to 60, with ‘0’ meaning to zoom out as far as possible and ‘60’ meaning to zoom in until image pixels are 1:1 with sensor pixels.
from linuxpy.video.device import Device, VideoCapture
dev = Device("/dev/video2")
dev.open()
zoom = dev.controls['zoom_absolute']
cap = VideoCapture(dev)
cap.set_format(1600,1200,"MJPG")
zoom.set_to_maximum()
with cap as frames:
    for frame in frames:
        # etc
The zoom object has minimum, maximum and value properties, so you
can set it to whatever zoom level you want.
Zoom in OpenCV
Likewise, in OpenCV zoom is a value from 0 to 60. There’s no way I
can see to ask what the minimum or maximum values are, but if you set
the zoom to a large number it’ll return True to indicate success but
actually set it to the maximum.
>>> cap = cv2.VideoCapture(2)
>>> assert cap.set(cv2.CAP_PROP_ZOOM, 1000000)
>>> cap.get(cv2.CAP_PROP_ZOOM)
60
A Very Simple Web Server
To put it all together, here’s a very simple python program which
looks for a camera called OPENAICAM: OPENAICAM and makes an
MJPEG stream available on http://0.0.0.0:8888/.
Frames are grabbed as rapidly as they are available and put in
image_buffer. By sending
the JPEG data straight from the camera we can avoid re-encoding losses.
The cam_event means that slower clients will
miss some frames, a primitive kind of throttling.
It’s kind of stupid, but it works:
import asyncio
from io import BytesIO

from aiohttp import web, MultipartWriter, ClientConnectionResetError
from linuxpy.video.device import iter_video_capture_devices, VideoCapture, Device

def find_device(device_name):
    for dev in iter_video_capture_devices():
        dev.open()
        if not device_name or dev.info.card == device_name:
            return dev
        dev.close()

device = find_device('OPENAICAM: OPENAICAM')
assert device

image_buffer = BytesIO()
cam_event = asyncio.Event()

async def root_handler(request):
    return web.Response(body="""<html><img src="/cam"></html>""", content_type='text/html')

async def cam_handler(request):
    try:
        my_boundary = "the-mjpeg-boundary"
        response = web.StreamResponse(status=200, reason='OK', headers={
            'Content-Type': 'multipart/x-mixed-replace;boundary=' + my_boundary
        })
        await response.prepare(request)
        while True:
            await cam_event.wait()
            with MultipartWriter('image/jpeg', boundary=my_boundary) as mpwriter:
                mpwriter.append(image_buffer.value, { 'Content-Type': 'image/jpeg' })
                await mpwriter.write(response, close_boundary=False)
    except ClientConnectionResetError:
        pass
    return response

async def cam_task():
    cap = VideoCapture(device)
    cap.set_format(1024, 768, "MJPG")

    with cap as frames:
        async for frame in frames:
            image_buffer.value = frame.data
            cam_event.set()
            cam_event.clear()

app = web.Application()
app.add_routes([
    web.get('/', root_handler),
    web.get('/cam', cam_handler),
])

if __name__ == "__main__":
    loop = asyncio.get_event_loop()
    loop.create_task(cam_task())
    web.run_app(app, loop=loop, port=8888)
Next Steps
While not everything about this camera setup is ideal, it’s a good start and with the camera attached to an XYZ stage I’m just about ready to put together a web interface which will display the camera output while allowing control over movement, focus and zoom.
I’d like to set the camera up to move automatically and build up a composite picture of the entire sample. The depth of field of these lenses is very small, so we effectively have to scan in X, Y and Z to see everything, and then we can combine images with focus stacking.
Before I do much more coding though I need to spend some time in the physical world working out how to improve the lighting. When the image is zoomed in there’s a lot of shot noise visible, but this is visibly reduced by increasing the illumination of the sample. I also have to manage the amount of heat the sample is exposed to.
-
called ‘1/2.3”’ for historical reasons, rather misleading but at least I finally understand why MFT system is called “four thirds” despite being only 21.63mm on the diagonal. ↩
-
The diagonal is the important dimension for the optics as that’s the size of the “image circle” required to avoid vignetting ↩
-
your humans may vary ↩